
If you’re someone who loves cooking and enjoys trying new recipes, especially those that promise a delightful treat, these easy chocolate scones are a must-try. Created by the talented John Kanell from Preppy Kitchen, this recipe delivers decadent, melt-in-your-mouth chocolate scones that are soft, moist, flaky, and utterly delicious. Whether you’re looking for a breakfast delight, a brunch favorite, or a grab-and-go snack, these scones perfectly pair with coffee or tea and will quickly become one of your favorite recipes.
Gathering the Perfect Dry Ingredients
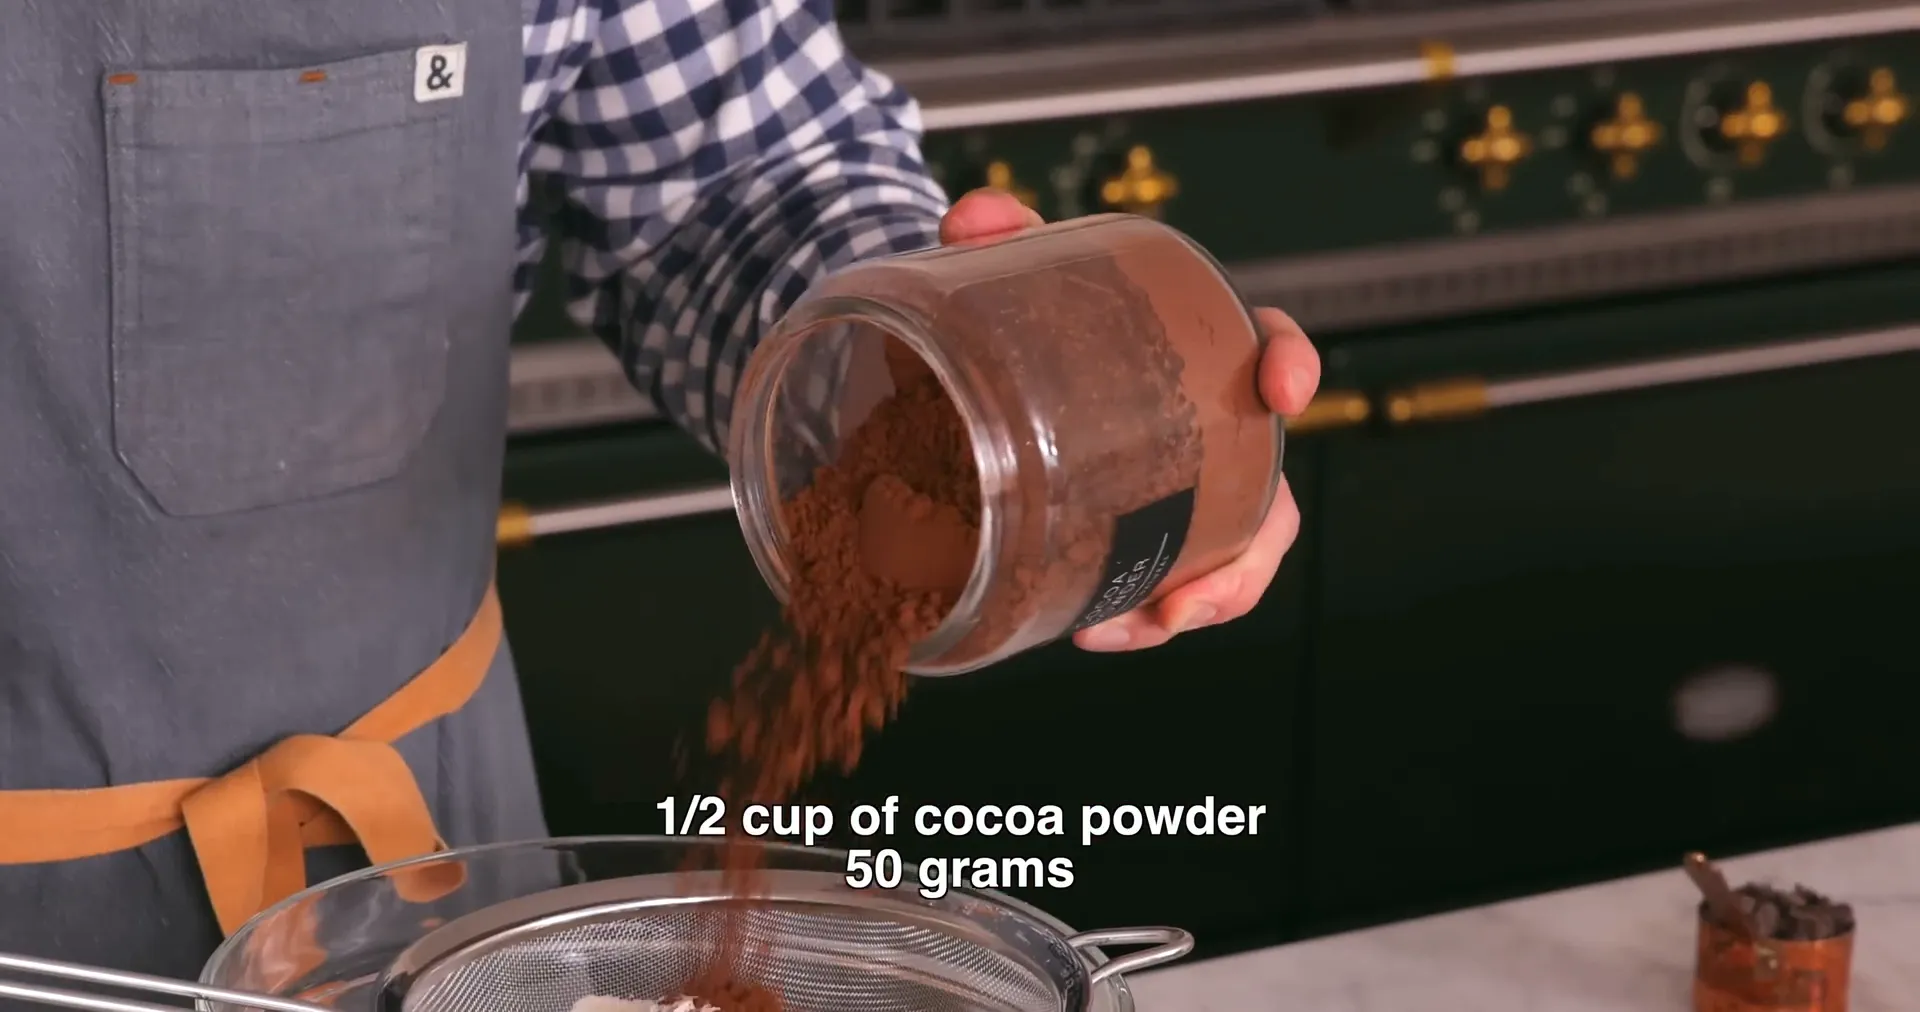
Starting with the basics, the foundation of these chocolate scones lies in combining the right dry ingredients. The recipe calls for 2 1/4 cups (270 grams) of all-purpose flour, sifted to avoid clumps, especially since cocoa powder tends to be clumpy. Half a cup (50 grams) of Dutch-processed cocoa powder is used here to give the scones a richer, fudgier flavor, but natural cocoa powder works too if that’s what you have on hand.
Alongside the cocoa powder, add a quarter cup (50 grams) of sugar to sweeten and soften the dough, a quarter teaspoon of salt for contrast, and 2 1/2 teaspoons of baking powder to help the scones puff up beautifully in the oven. Mixing these ingredients well ensures a balanced flavor and a light texture.
The Secret to Buttery, Flaky Texture: Cold Butter and Chocolate Chips
What makes these scones stand out from dry, store-bought versions is the buttery, flaky texture. The trick is using half a cup (113 grams) of cold unsalted butter, carefully cubed. Cold butter is essential here because it helps create distinct layers and pockets inside the dough as it bakes, resulting in that melt-in-your-mouth, tender crumb.
Instead of mixing the butter in completely, the butter pieces are cut into the flour mixture until they are about pea-sized. This can be done with fingers or a pastry blender—especially useful if you have warm hands or want to avoid messy cocoa powder stains on your nails.
Once the butter is ready, a third of a cup of chocolate chips is folded in, adding delightful bursts of chocolate throughout the scones.

Bringing It All Together with Heavy Cream
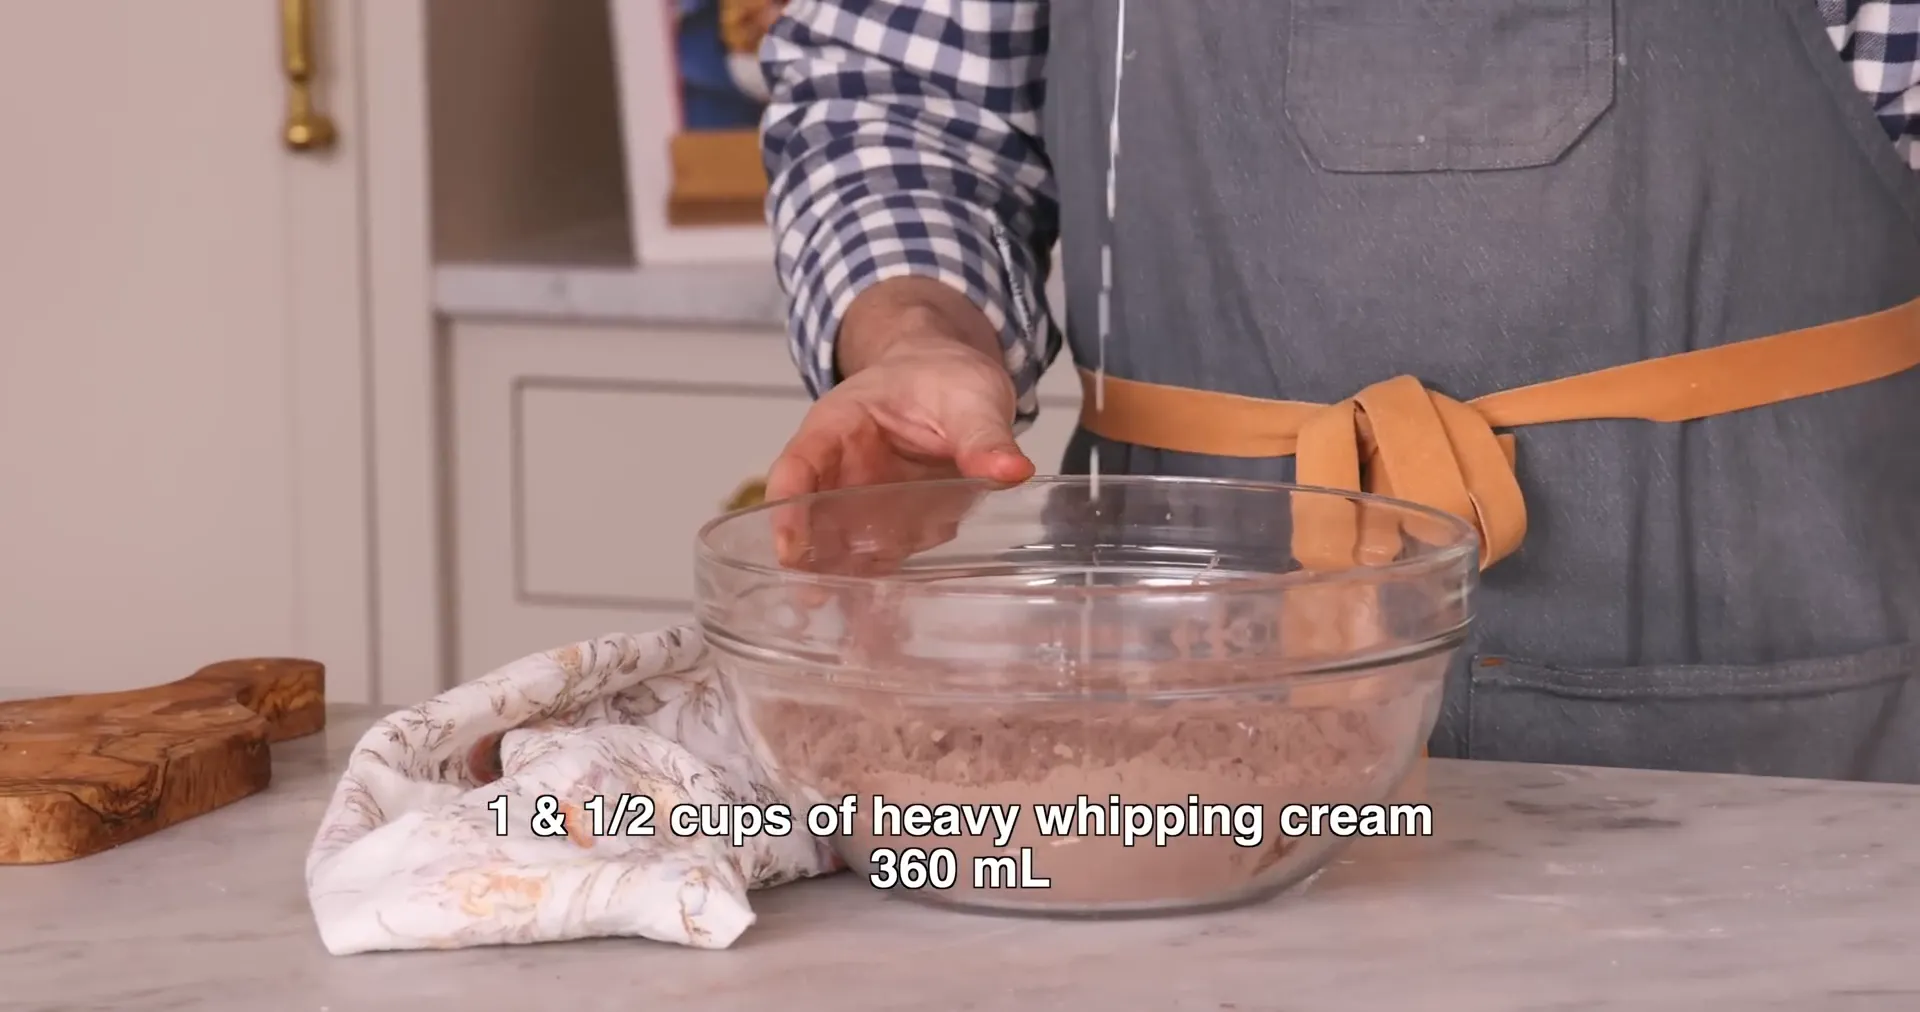
The magic ingredient that holds this dough together while adding richness is cold heavy whipping cream. About 1 1/2 cups of it is added to the mixture, and then gently worked in with a spatula or fork until a shaggy dough forms. It’s important not to overwork the dough, as this would develop the gluten and lead to tougher, less tender scones.
Since flour measurements and humidity can vary, the dough’s moisture is adjusted by adding extra cream a tablespoon at a time until it feels just right—shaggy, wet, and holding together without being too dry.
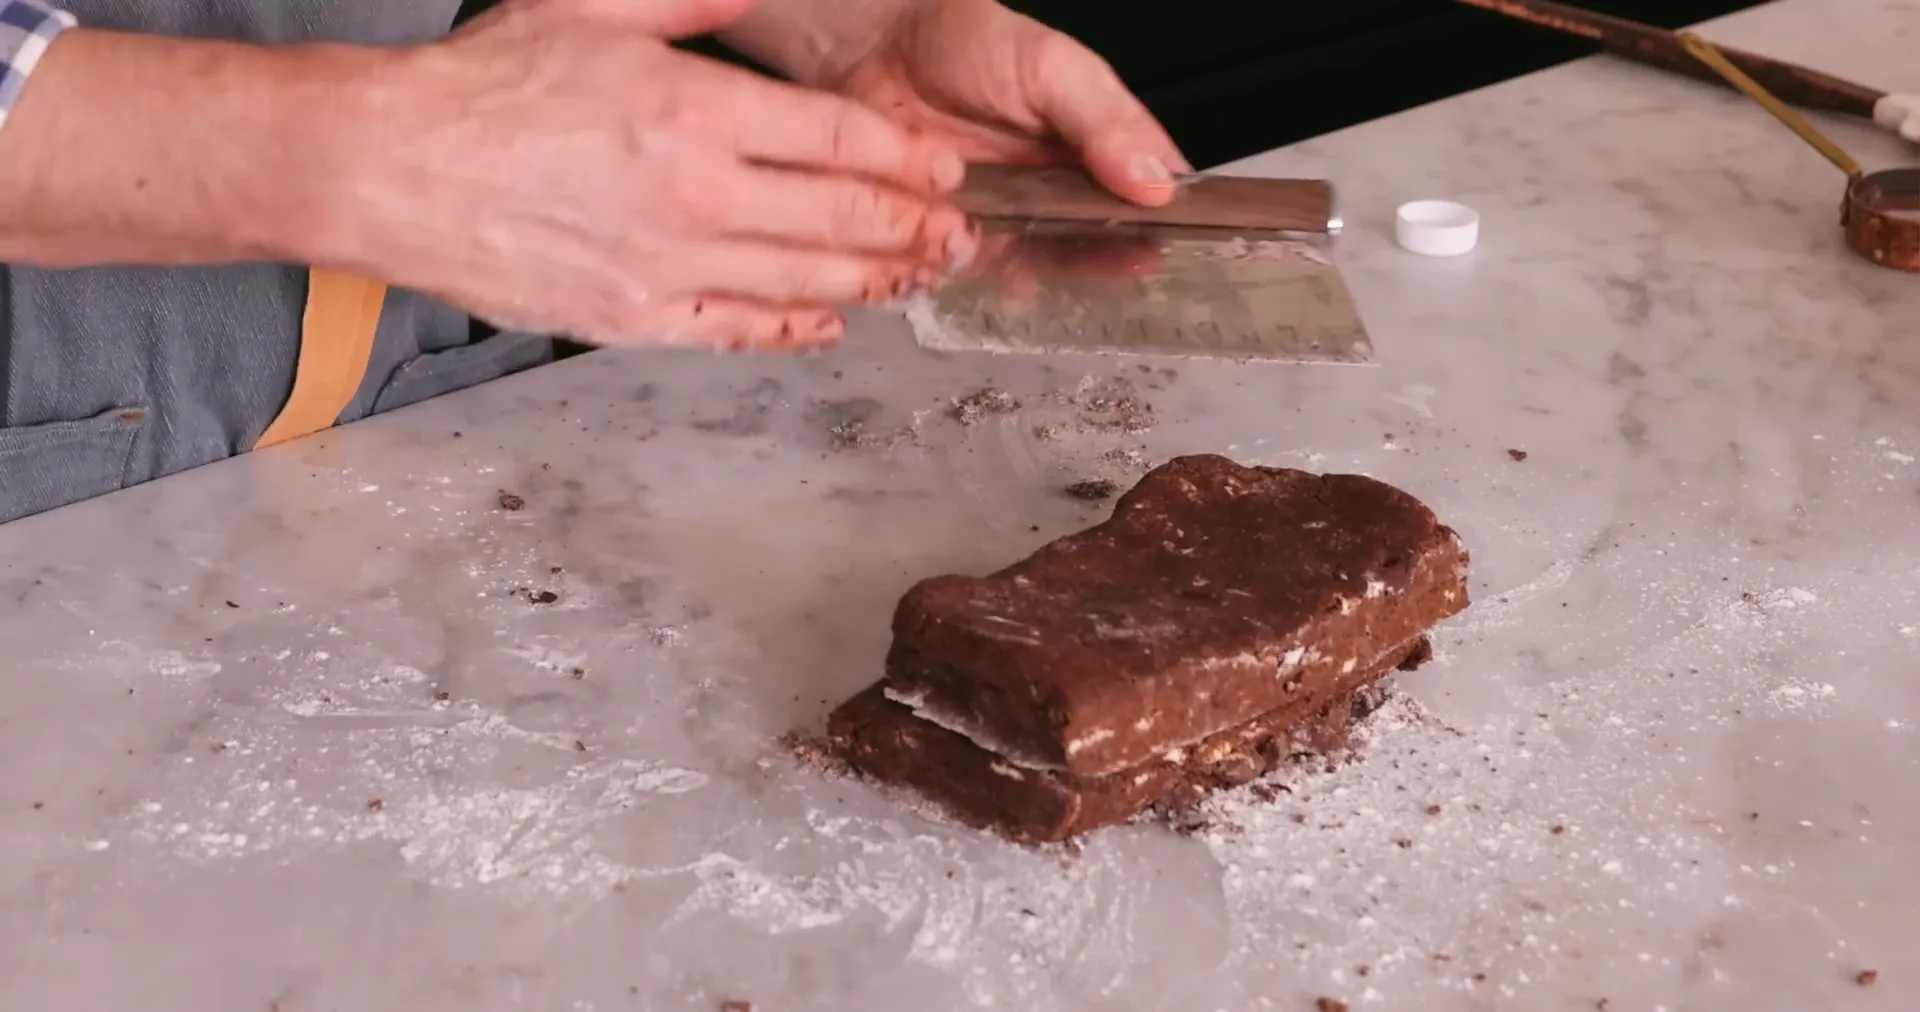
Laminating the Dough for Flaky Layers
Once the dough is ready, it’s turned out onto a lightly floured surface and shaped into a rectangle or square. The dough is then cut in half and stacked, patted down again, and cut and stacked one more time before being shaped into a 7-inch disc. This layering technique is key to creating flaky, tender layers in the finished scones, similar to rough puff pastry.
After shaping, the disc is cut into eight roughly equal wedges and placed on a parchment-lined baking sheet. The scones chill in the fridge for at least 15 minutes to firm up, which helps them maintain their shape and develop structure when baked.
Baking and Finishing Touches
Bake the scones in a preheated 400°F oven for 18 to 20 minutes, or until they are puffed up and the centers are dry. Rotating the pan halfway through baking ensures even cooking and golden crusts on all sides.
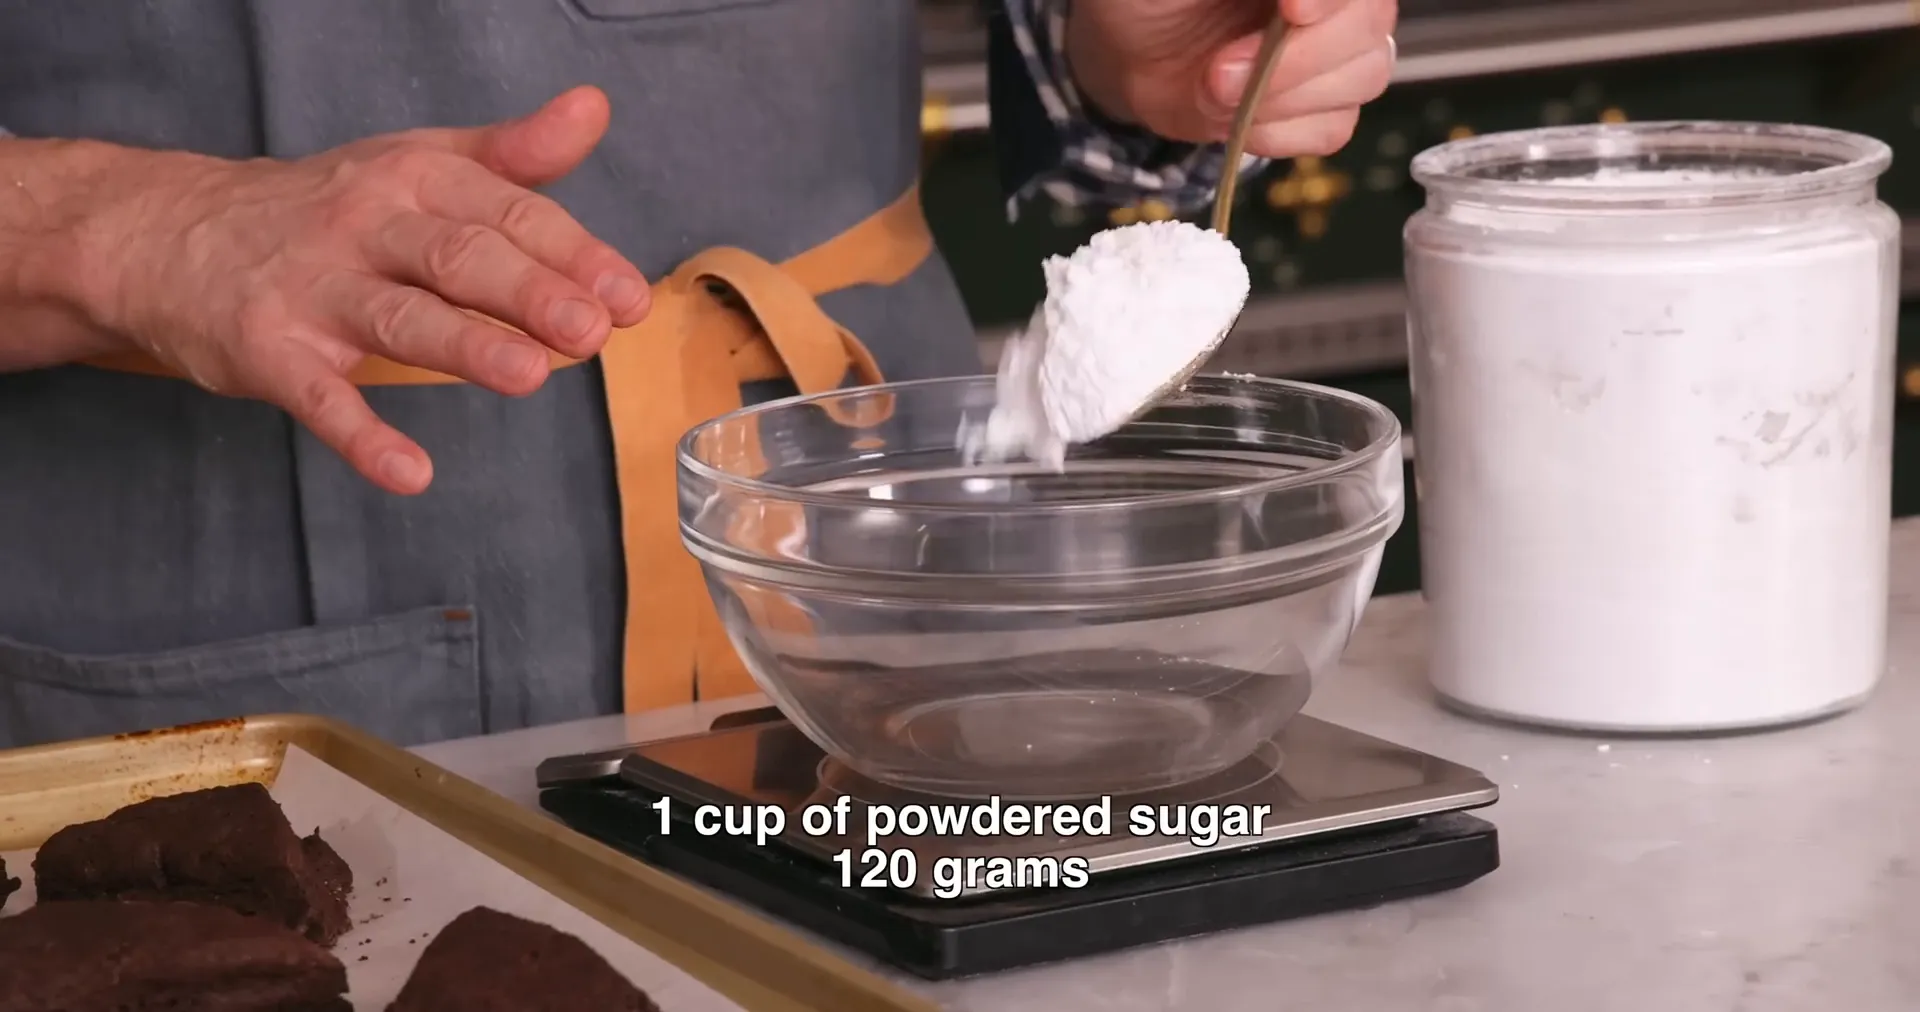
Once cooled, a simple yet indulgent chocolate glaze is whisked together with powdered sugar, cocoa powder, milk, and a touch of vanilla. Adjust the glaze’s consistency with a little extra milk to make it perfect for drizzling over the scones.
The glaze can be drizzled on top or the scones can even be dipped for a more decadent chocolate coating. For an extra flavor boost, sprinkle with flaked sea salt to contrast the sweetness and enhance the chocolate notes.
Enjoy and Store with Ease
These chocolate scones keep beautifully for up to four days in an airtight container, making them an excellent option for preparing ahead. Whether enjoyed fresh for breakfast or as a snack throughout the week, they maintain their moist, flaky texture and rich chocolate flavor.
For anyone who loves cooking, recipes, bon appétit moments, this easy chocolate scones recipe offers a perfect balance of simplicity and indulgence. Give it a try and delight in the buttery, chocolatey goodness that homemade scones can bring to your table!
This article was created from the video Easy Chocolate Scones Recipe with the help of AI.
Easy Chocolate Scones Recipe: A Perfect Treat for Cooking, Recipes, Bon Appetit Lovers. There are any Easy Chocolate Scones Recipe: A Perfect Treat for Cooking, Recipes, Bon Appetit Lovers in here.

