Chicken leg quarters have been gaining popularity for their rich flavor and versatility, and there's no better way to prepare them than with the innovative tiger cut technique. This method not only transforms the appearance of the chicken with striking tiger-like stripes but also ensures the seasonings penetrate deeply and the skin crisps up beautifully. Alongside this, a quick and delicious pan gravy made from the drippings elevates the dish to restaurant-quality in no time. Here’s a step-by-step guide to mastering this easy recipe that combines expert cooking techniques with simple ingredients for a succulent, crispy chicken experience.
Step 1: Prepare the Chicken with the Tiger Cut Technique
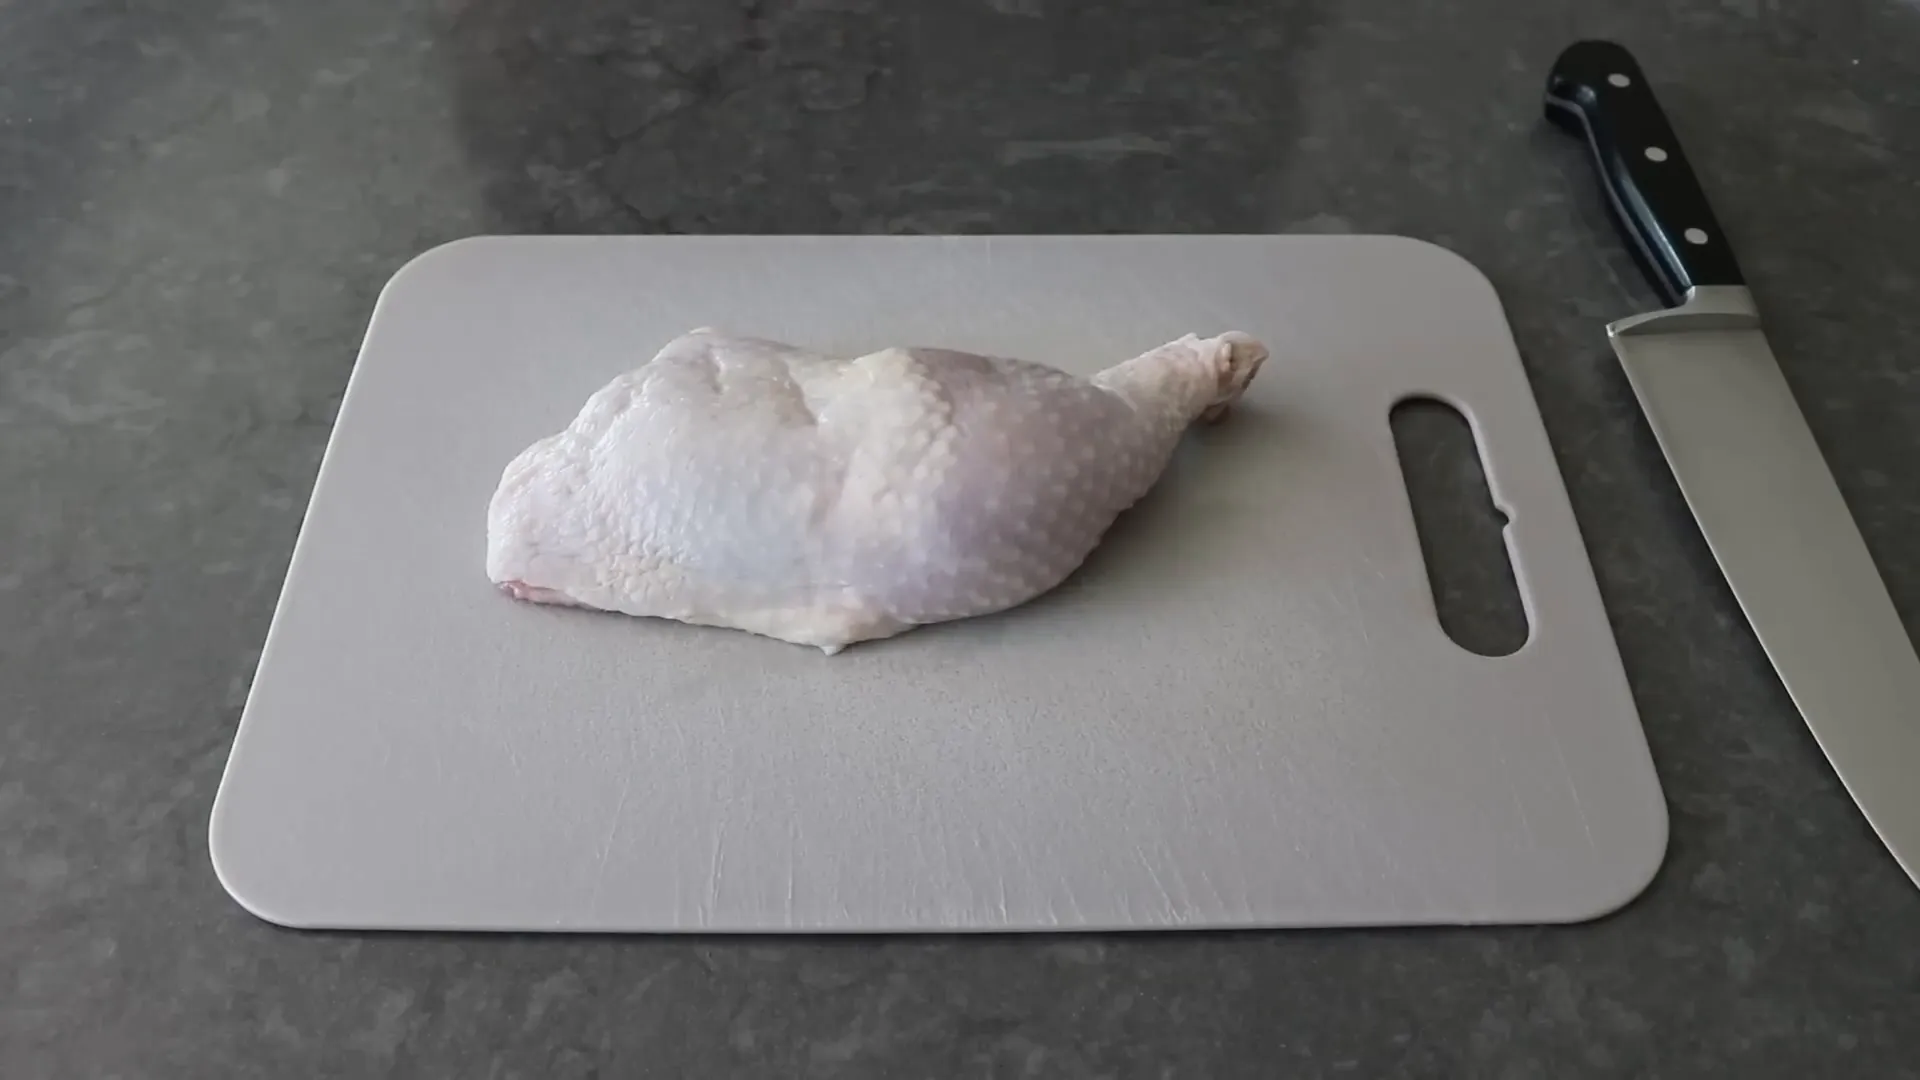
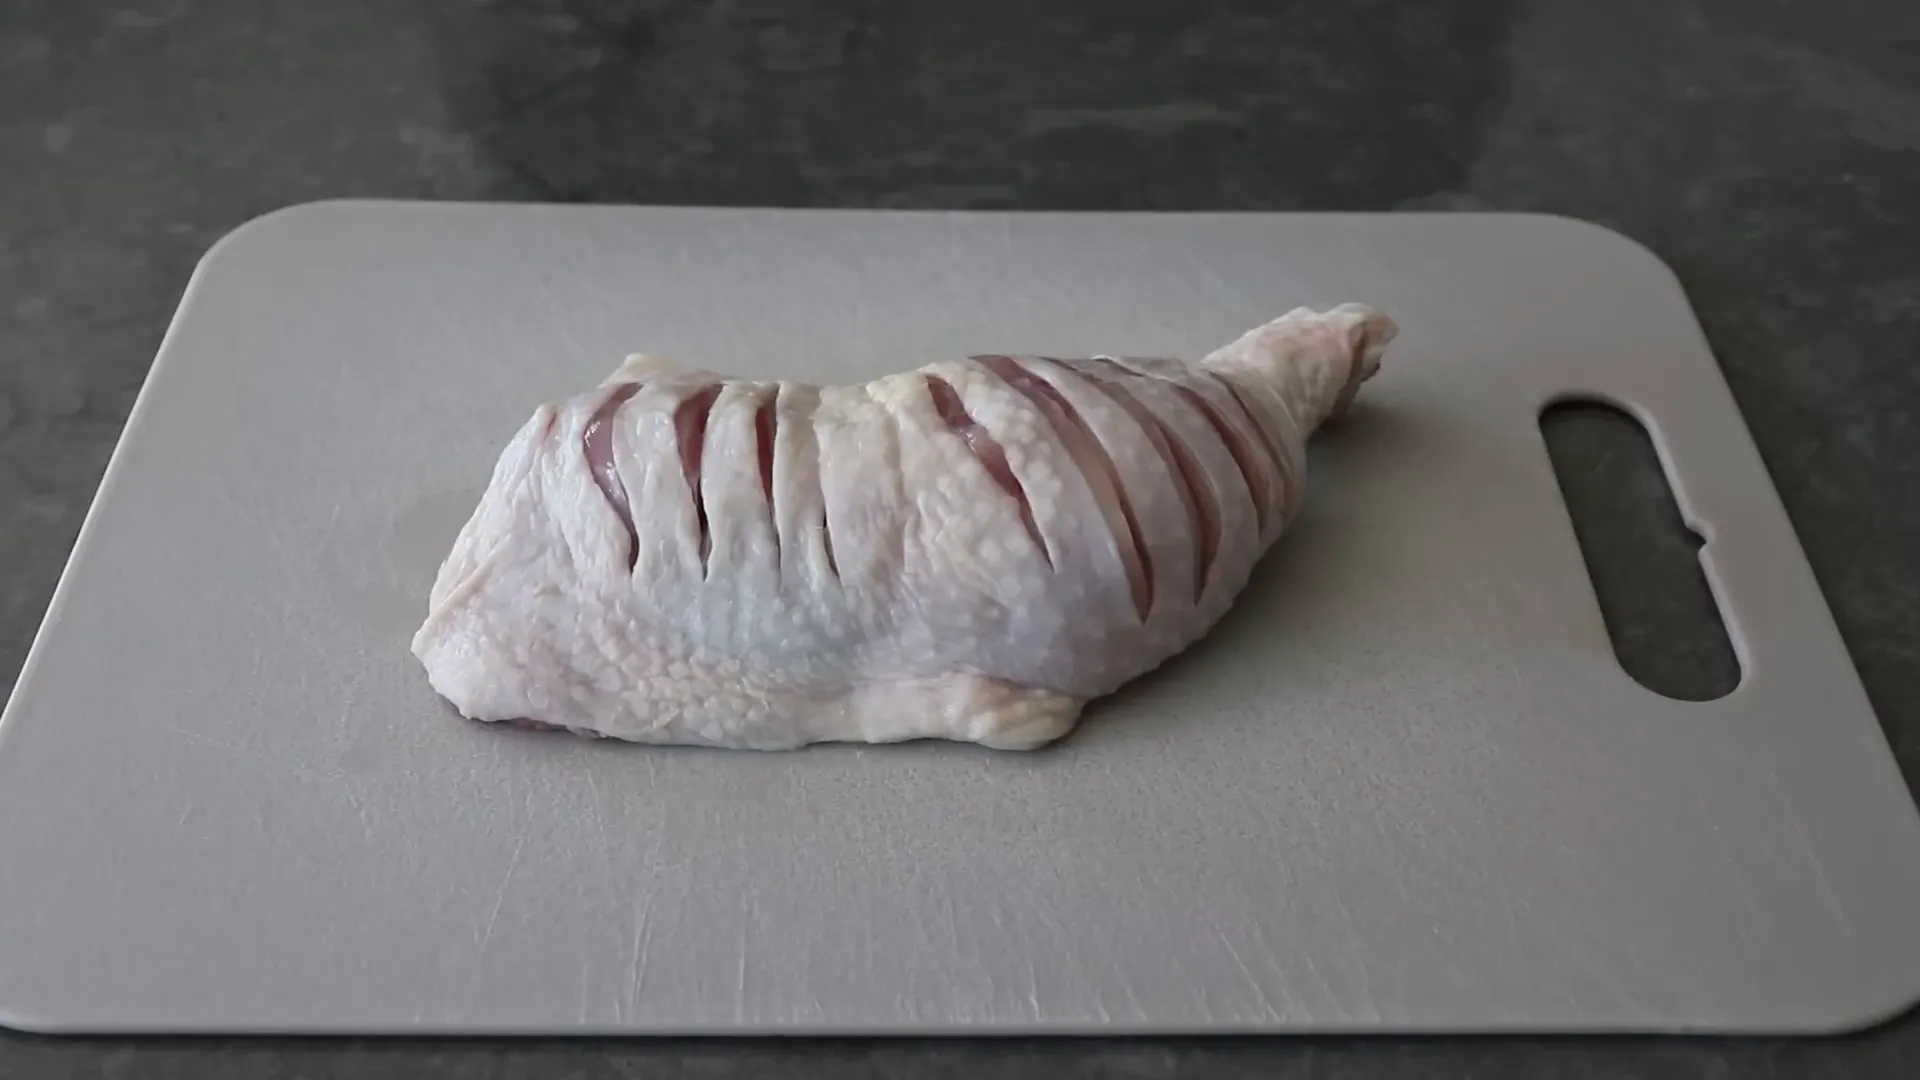
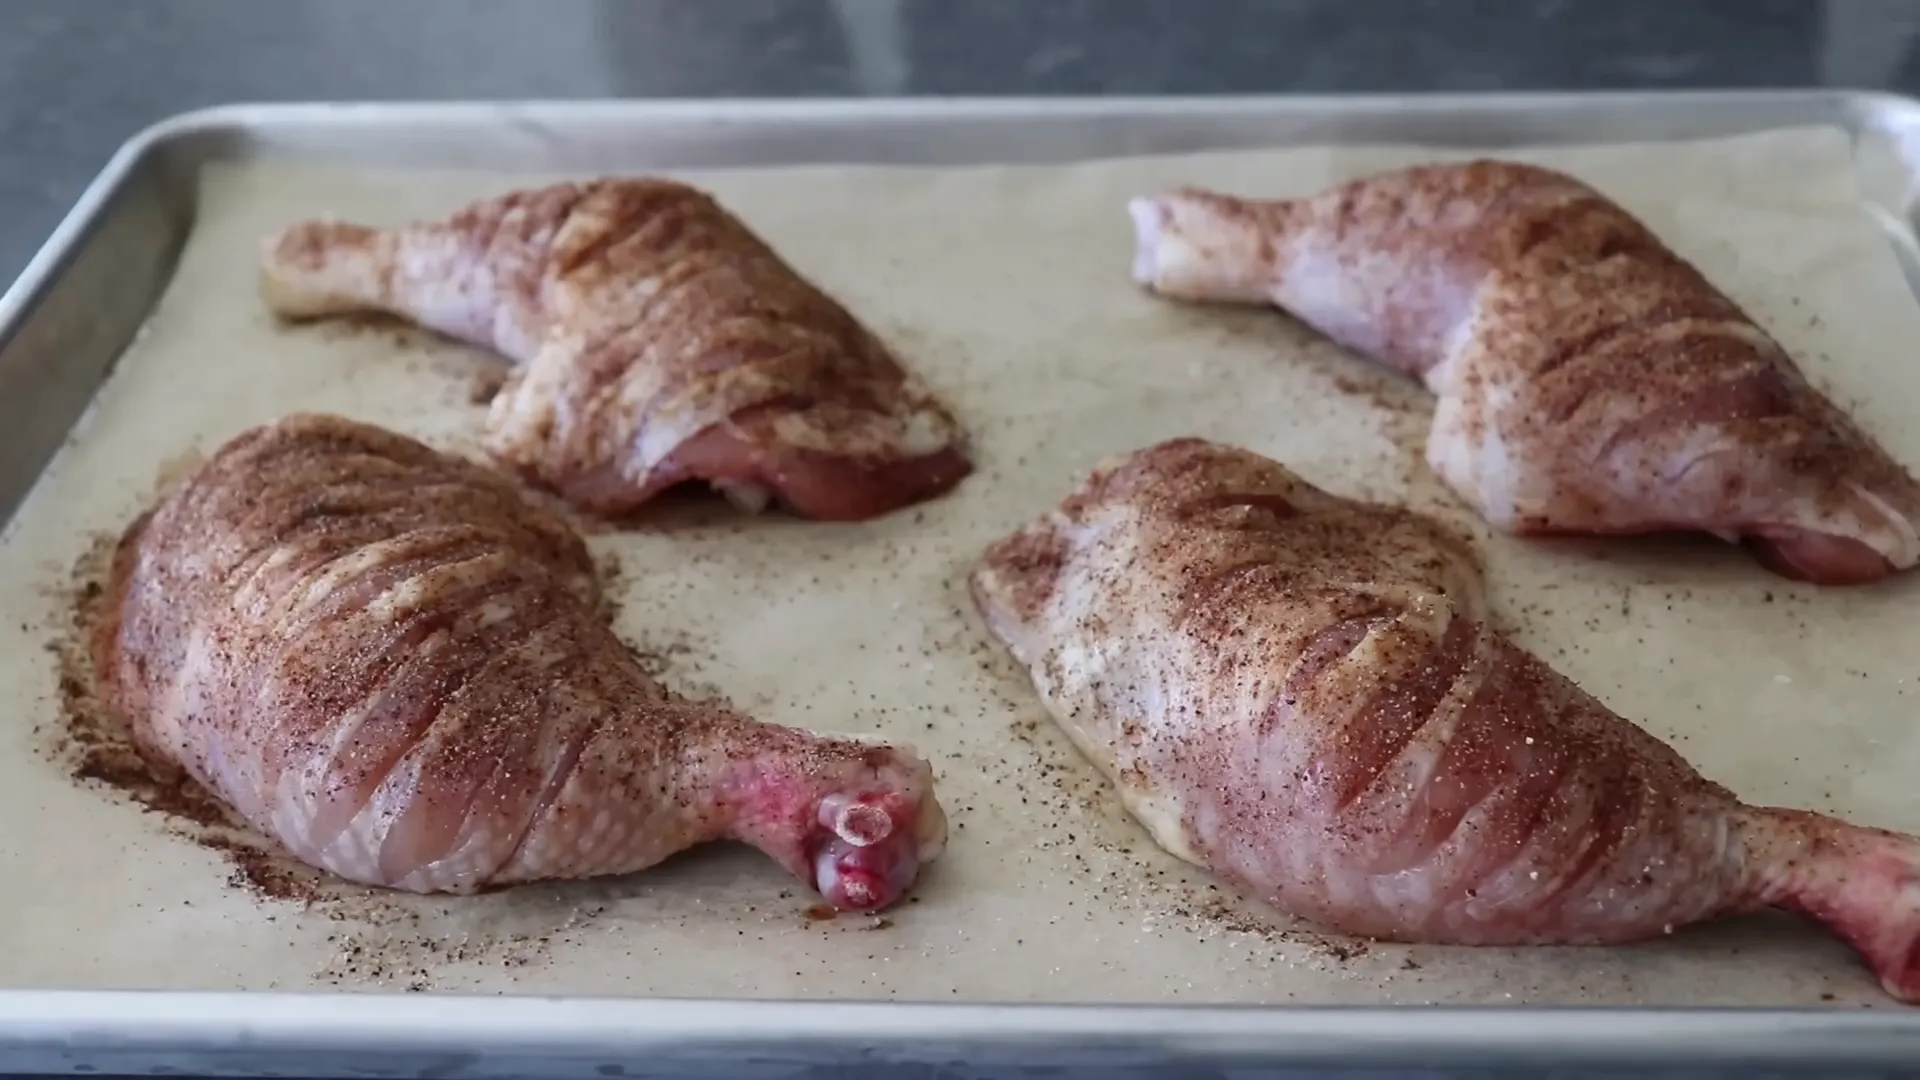
Start with chicken leg quarters—these are the drumstick and thigh still connected. Using a sharp knife, begin cutting about halfway up the leg, slicing down all the way to the bone. Continue making these cuts along the thigh until you reach the end. To make this easier, pinch both sides of the thigh; this pushes the meat up slightly, giving you more to cut through. When finished, your chicken will have deep cuts resembling tiger stripes, which is where this technique gets its name.
This isn’t just for show. These cuts allow seasonings to penetrate deeply into the meat and help the skin crisp up wonderfully during cooking.
Step 2: Season the Chicken Generously
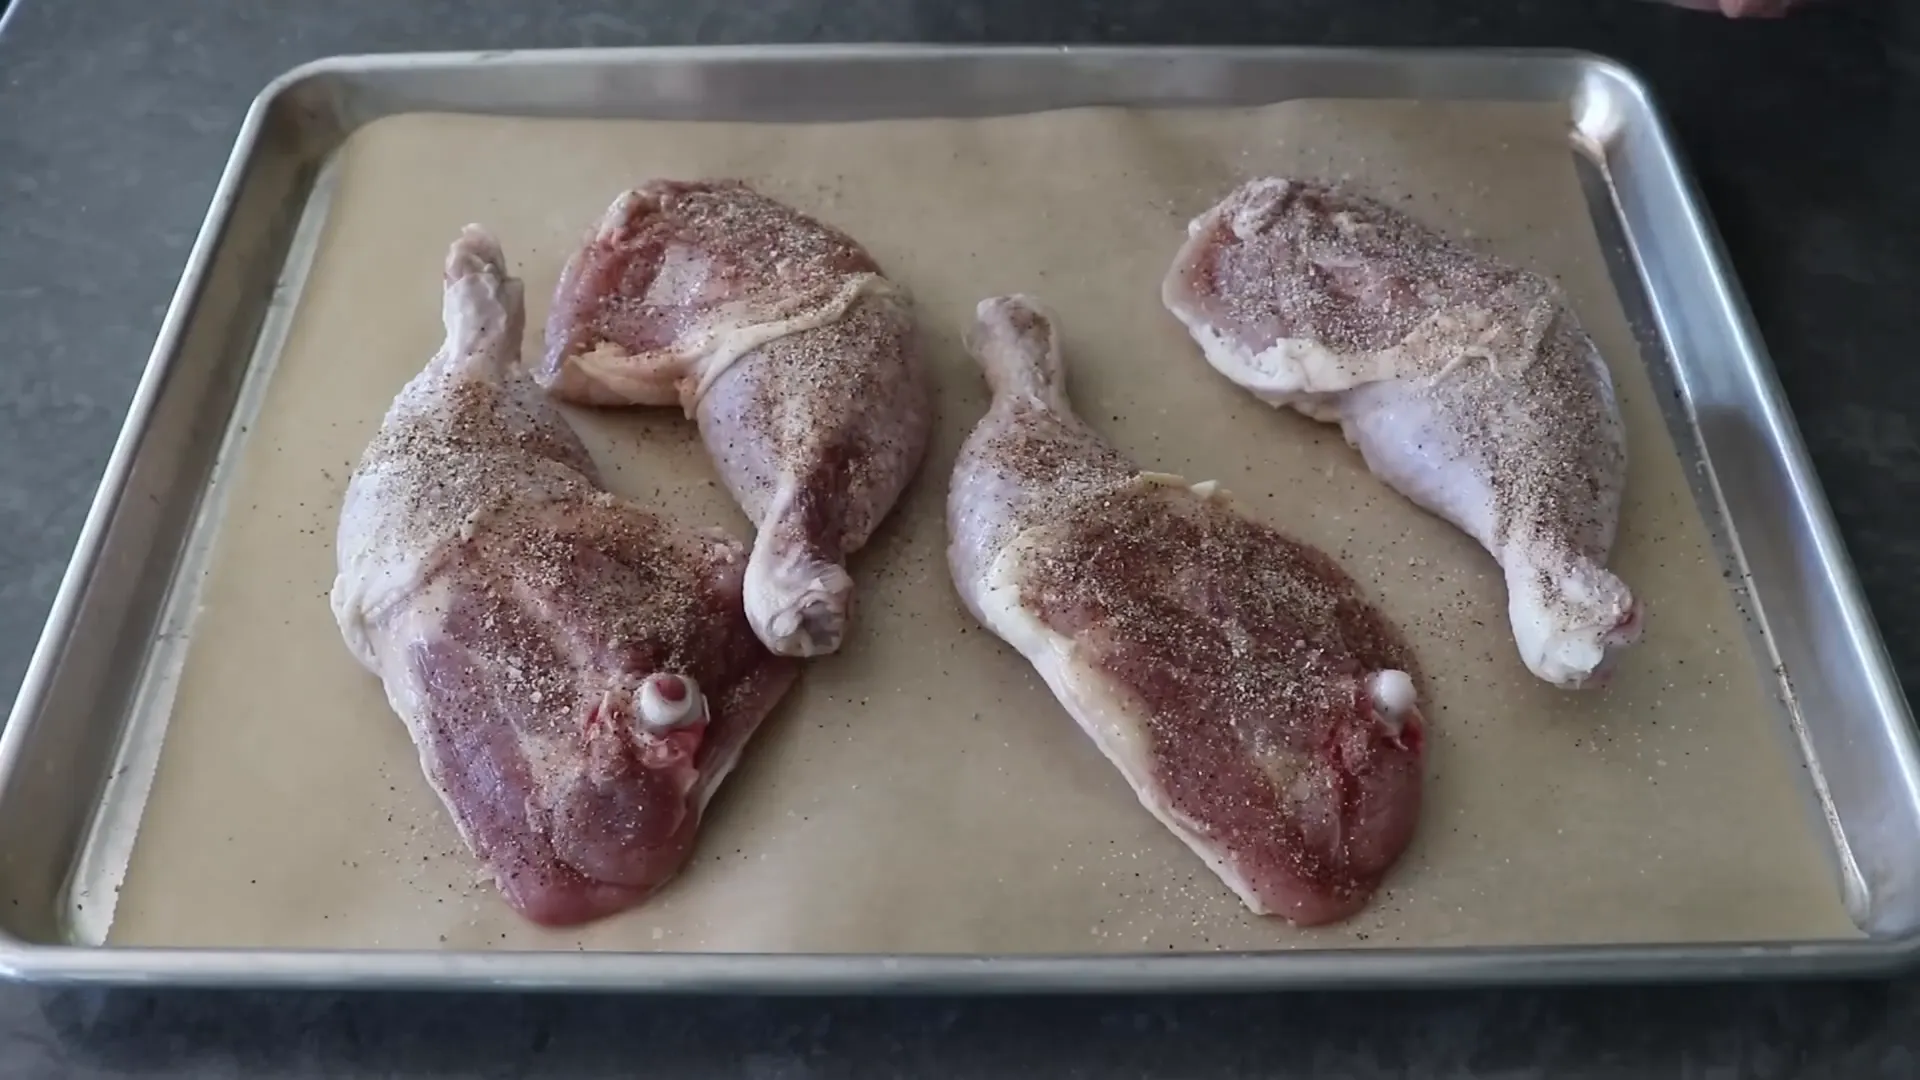
Place four tiger-cut chicken leg quarters skin side down on a parchment-lined baking sheet. Prepare a seasoning mix with the following:
- Kosher salt
- Freshly ground black pepper
- Garlic powder
- Ground chipotle (or substitute with cayenne or sweet paprika)
- Secret ingredient: a small touch of baking soda (not baking powder)
The baking soda is a game-changer—it chemically alters the skin, making it more alkaline and helping it crisp up beautifully. Mix these ingredients well, then apply about half the seasoning mix to the meat side of the chicken legs. Flip them over and apply the remaining seasoning to the tiger-cut skin side.
Feel free to customize the spices to your liking. The key is to season generously to infuse deep flavor.
Step 3: Dry the Chicken Overnight in the Fridge
Place the seasoned chicken uncovered in the fridge with the skin side up and let it dry overnight, ideally for about 14 hours. This step is crucial for several reasons:
- Allows the seasoning to penetrate deeply into the meat
- Dries out the skin, which leads to a crispier texture when baked
- Reduces moisture, concentrating flavors and tightening the meat’s texture
If you don’t have space for a baking sheet, just use a plate and transfer the chicken to a pan before cooking.
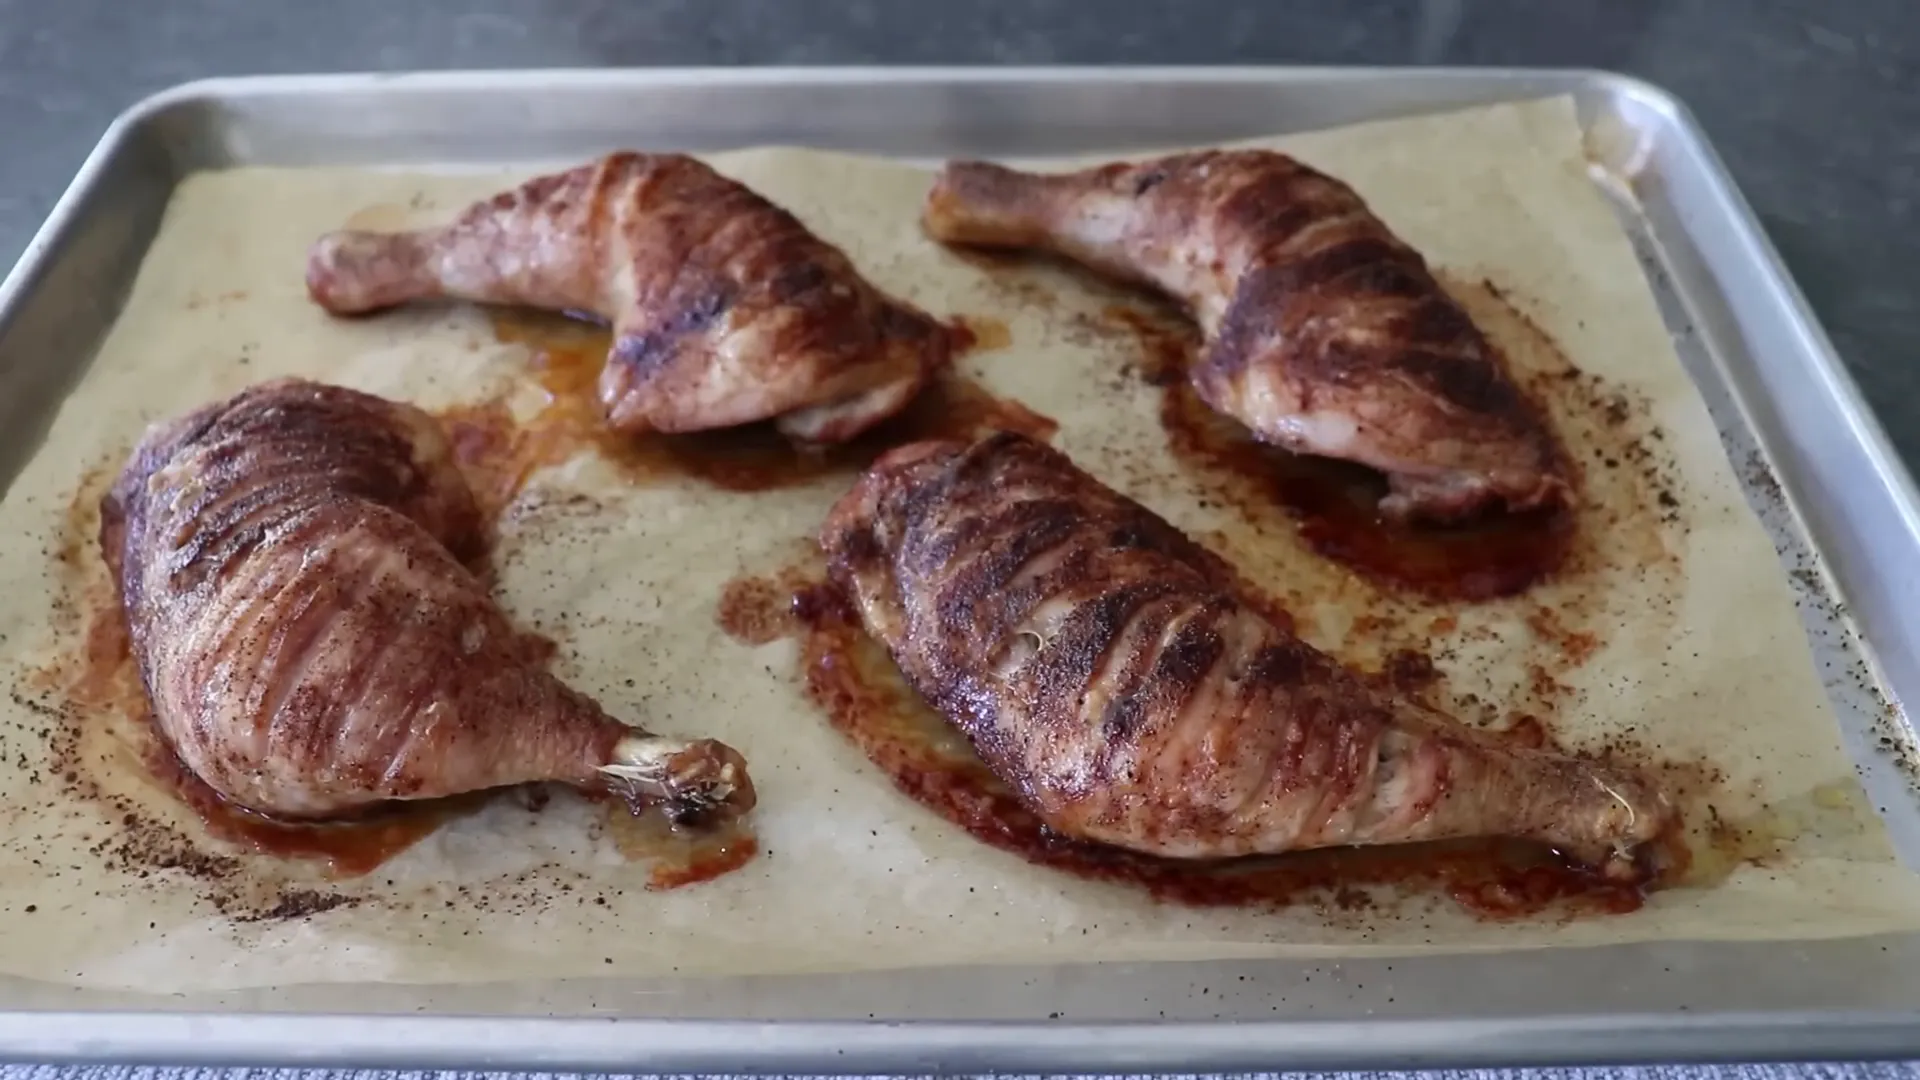
Step 4: Roast the Chicken at High Heat
After drying, do not oil the chicken. While oiling might enhance browning, skipping it results in the crispiest, most delicious skin. Place the chicken in the upper center of a 450°F oven for approximately 45 minutes, or until the chicken is fully cooked and the skin is crispy.
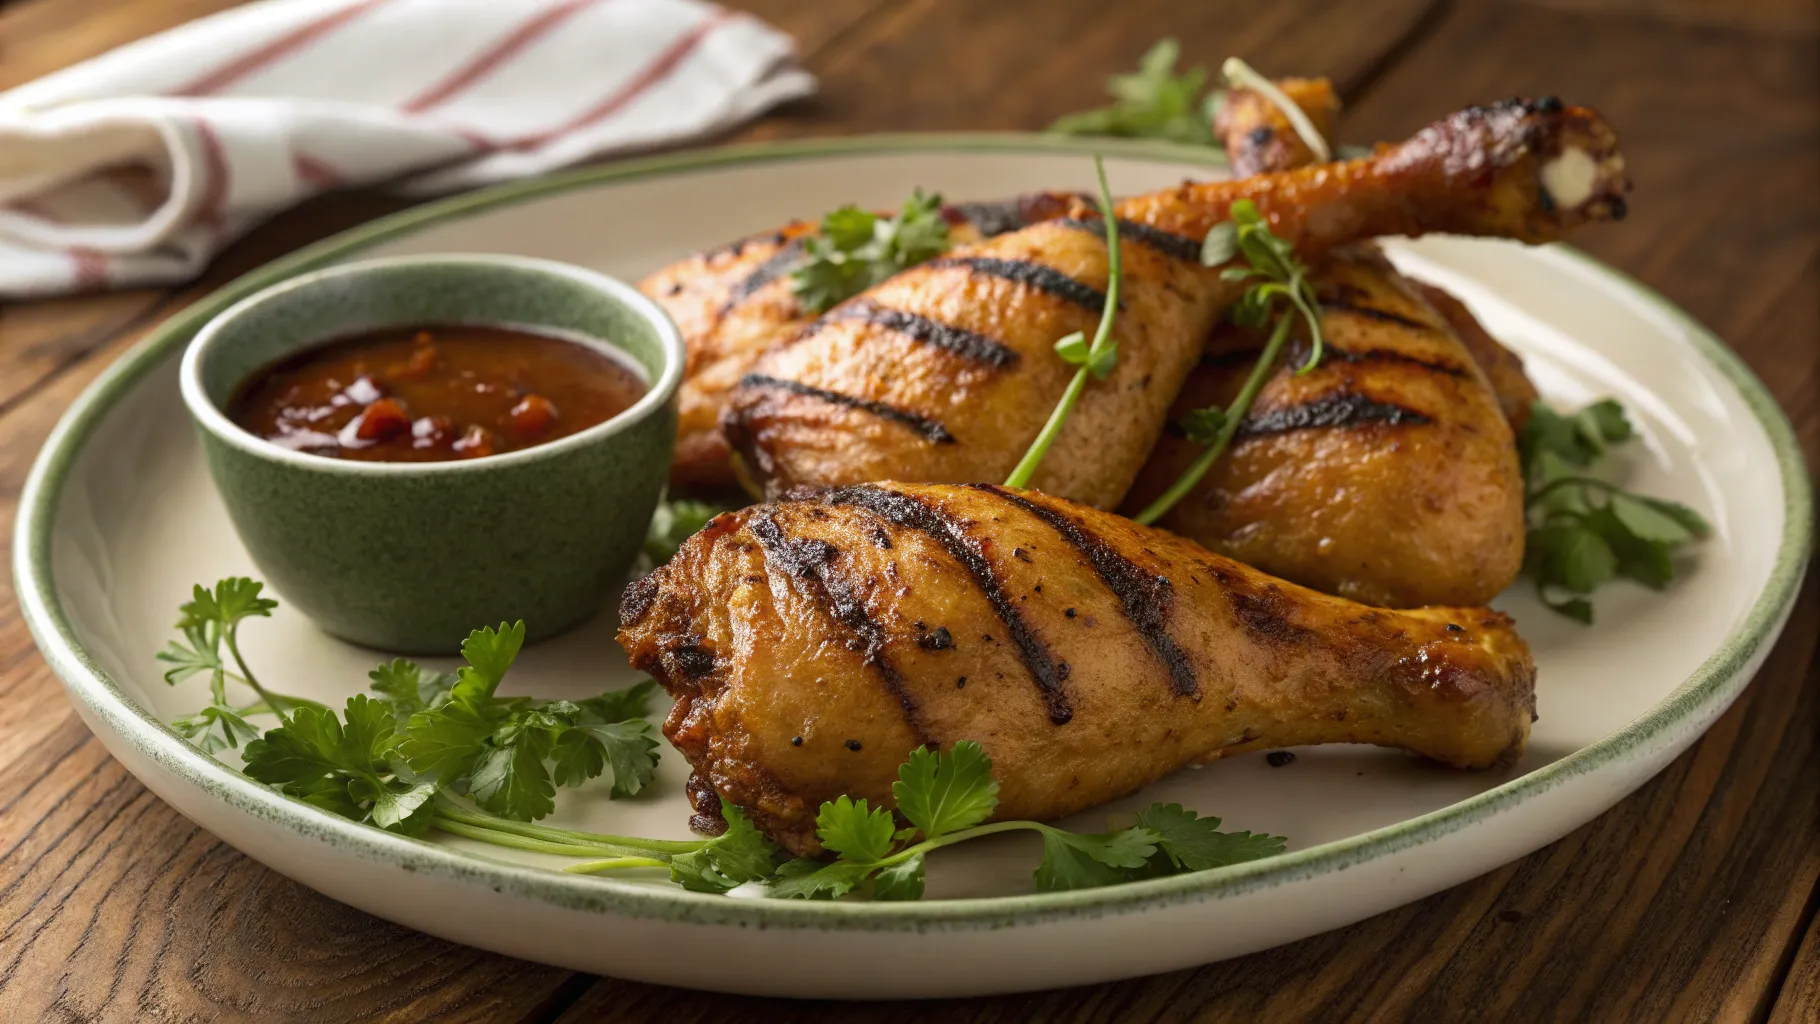
Once cooked, the chicken should have a golden, crusty exterior with succulent, perfectly seasoned meat inside.
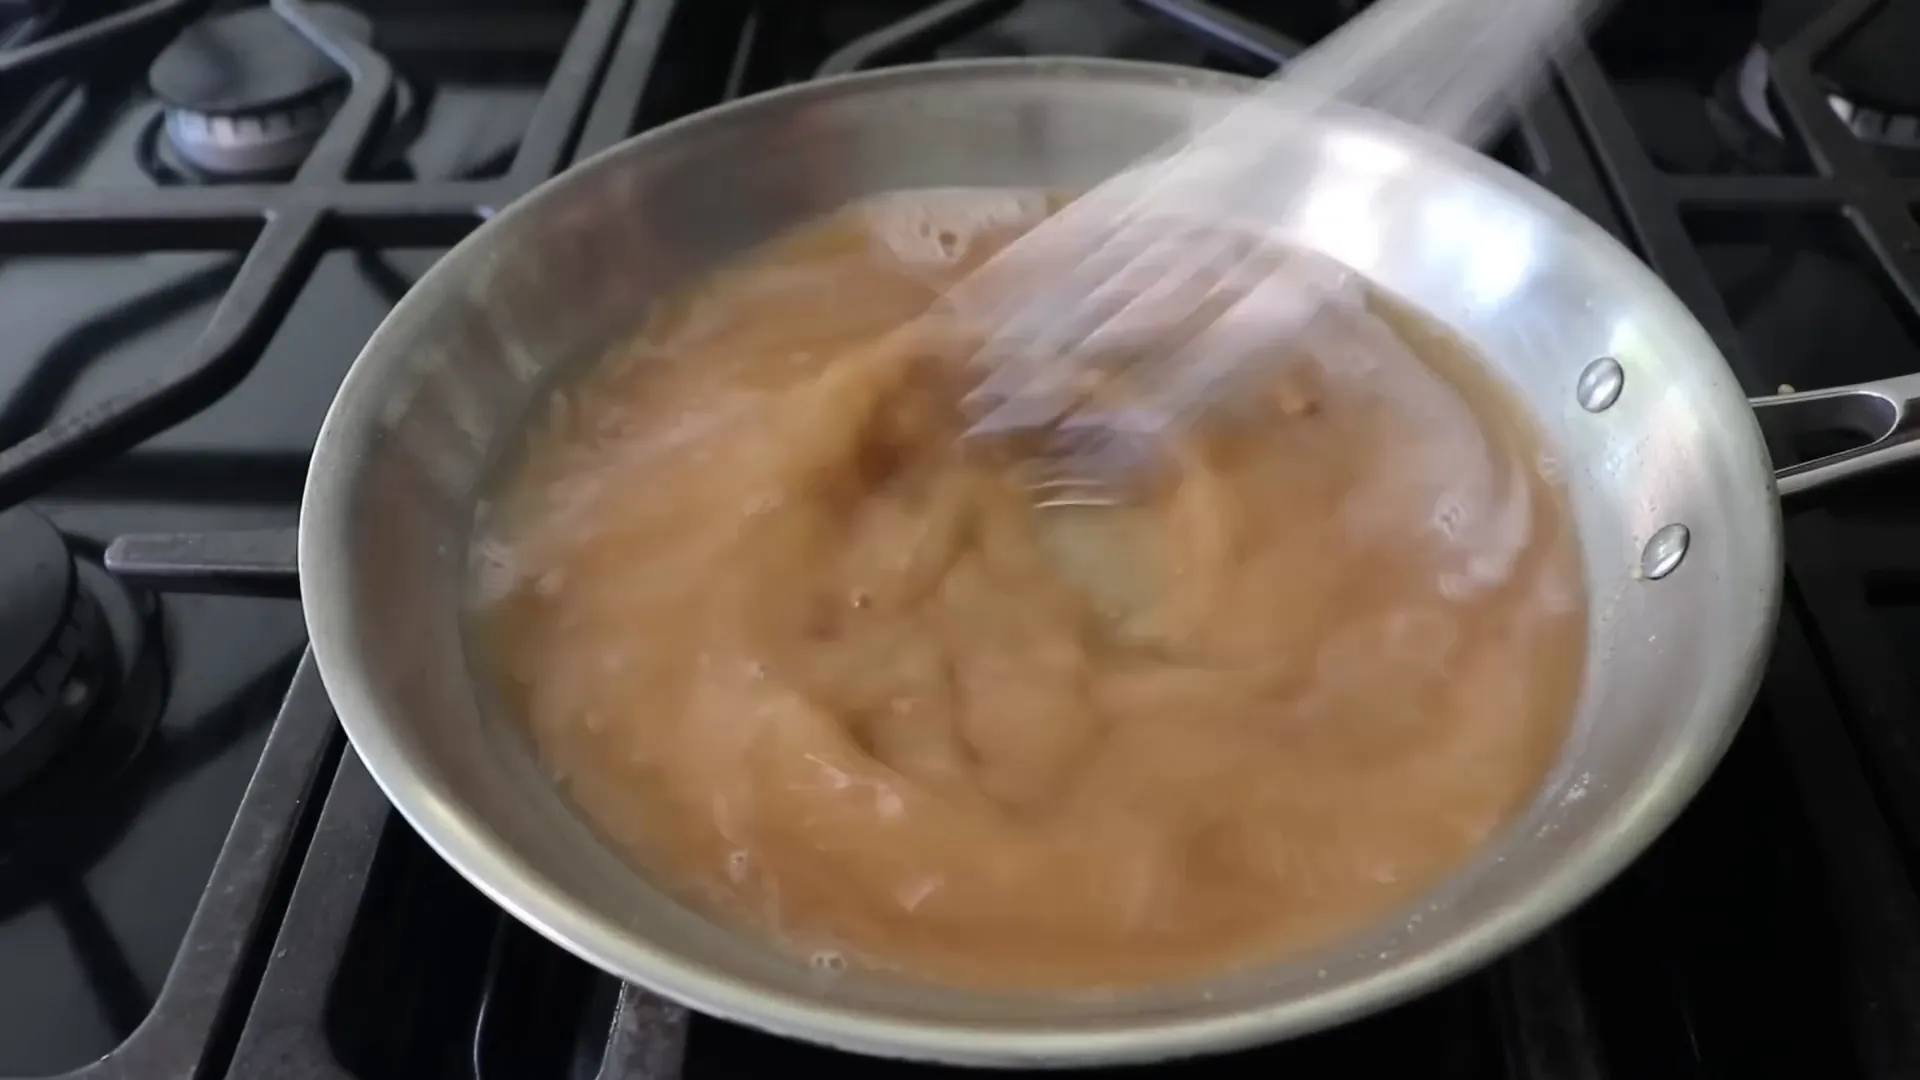
Step 5: Make the Quick and Flavorful Pan Gravy
While the chicken rests in a warm oven for about five minutes, use the drippings left on the parchment paper to create a simple pan gravy. Thanks to the nonstick parchment, scraping up the drippings is easy. From four chicken legs, you'll typically get about two tablespoons of fat, perfect for making a roux.
Here’s how:
- Place the fat in a pan over medium-high heat.
- Add two tablespoons of flour, whisking constantly, and cook for around two minutes until it smells like cooked pie crust and turns a golden color.
- Slowly whisk in cold chicken broth (or bone broth for extra richness). Adding cold liquid to a hot roux prevents lumps.
- Bring the mixture to a simmer; this is when the gravy thickens to perfection.
- If too thick, add more broth; if too thin, reduce it down.
- Season with salt, freshly ground black pepper, and a pinch of cayenne for a little kick.
- For an aromatic touch, toss in a sprig of tarragon (no chopping needed) and bruise it with the whisk to release its flavor.
In just five minutes, you’ll have a rich, flavorful pan gravy that can be strained or served as is—whichever you prefer.
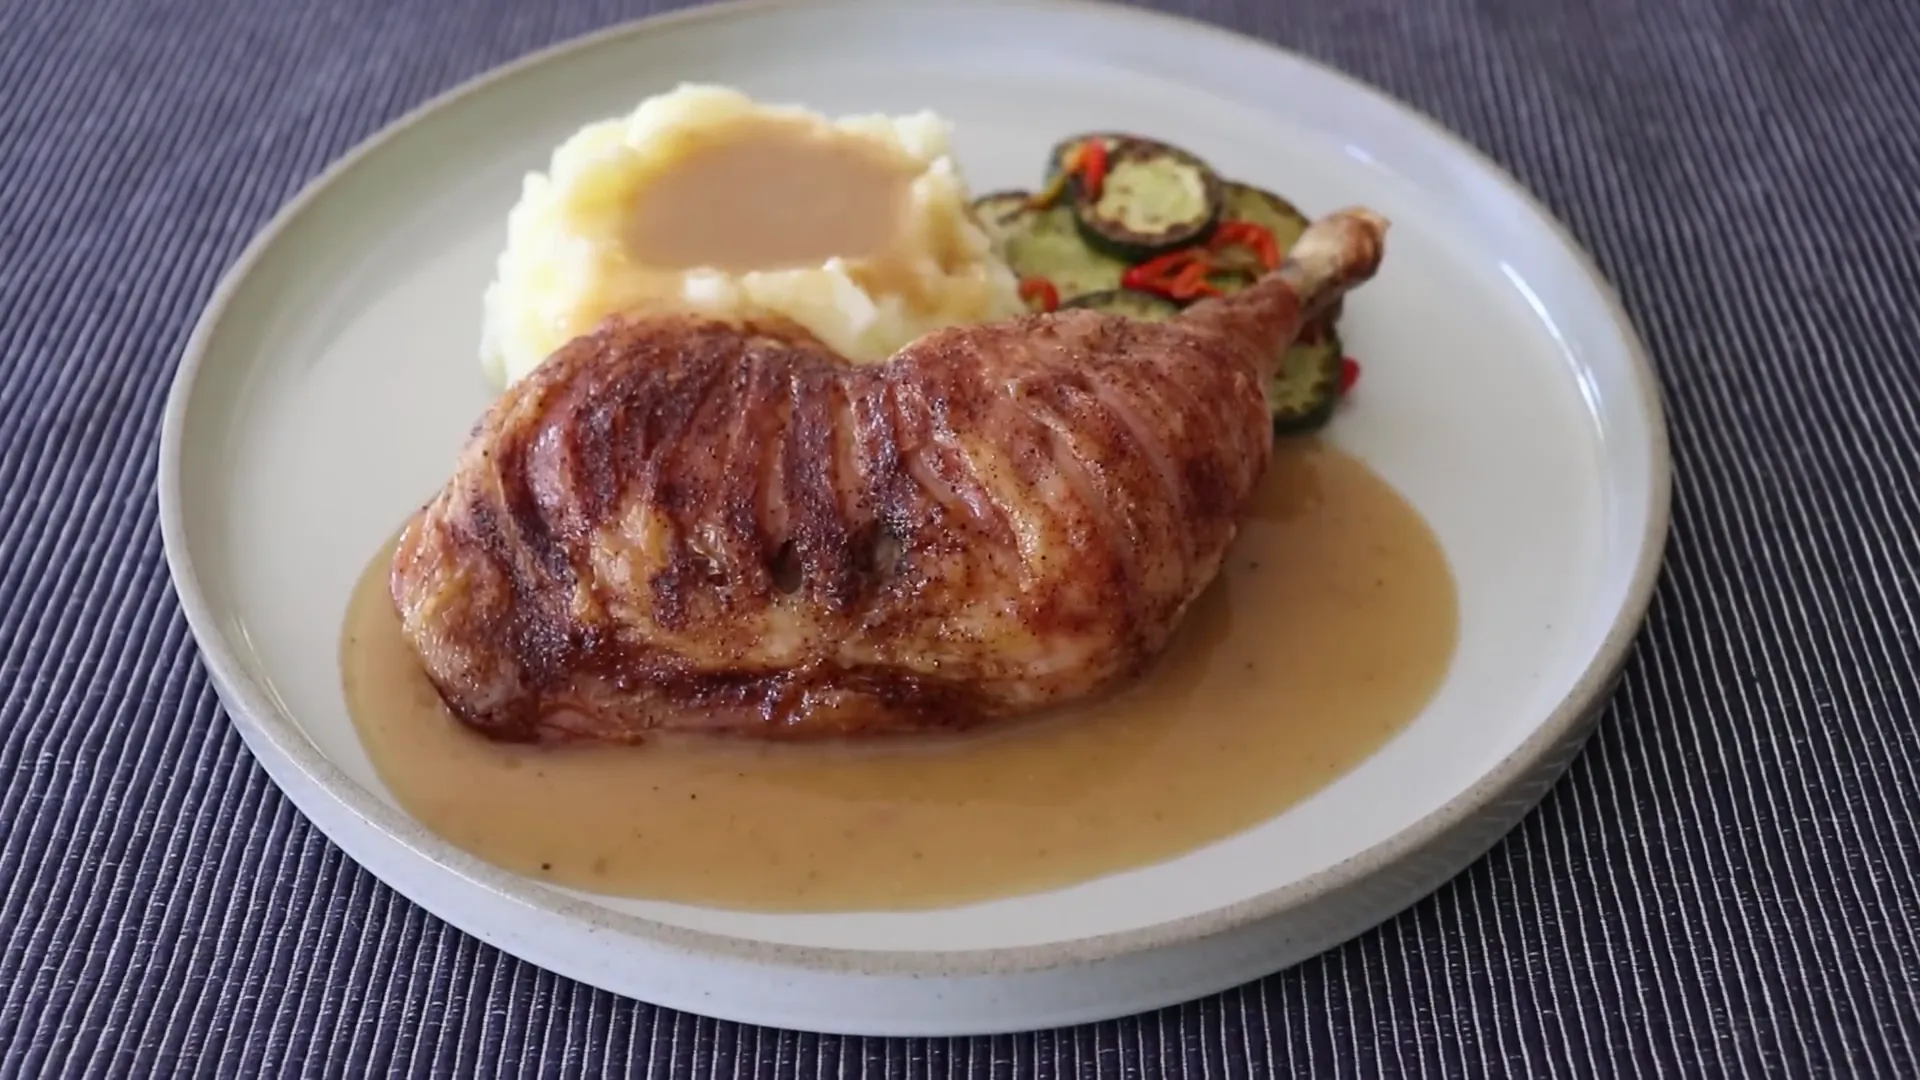
A Perfect Pairing: Serve with Mashed Potatoes and Enjoy!
Serve the tiger chicken generously sauced with the pan gravy, especially over mashed potatoes for a comforting meal. The skin is crusty and satisfying, the meat is juicy and full of flavor, and the gravy ties everything together beautifully.
This method of roasting chicken leg quarters results in a dish reminiscent of duck confit in its flavor depth and texture—rich, tender, and utterly delicious.
Whether you’re searching for a new way to cook chicken leg quarters or just want an excuse to indulge in mashed potatoes with gravy, this recipe is a must-try. It’s a perfect example of how simple cooking techniques and easy recipes can produce extraordinary results.
For the full ingredient list, printable recipe, and more details, check out the links below:
- Printable Tiger Chicken Recipe
- Become a Member of Food Wishes
- More Recipes from Chef John at Food Wishes
Enjoy this crispy, succulent tiger chicken and quick pan gravy as your next cooking adventure in easy recipes!
Tiger Chicken and 5-Minute Chicken Gravy Pan Sauce: A Crispy, Flavorful Delight for Easy Recipes and Cooking. There are any Tiger Chicken and 5-Minute Chicken Gravy Pan Sauce: A Crispy, Flavorful Delight for Easy Recipes and Cooking in here.

